Showing posts with label Create a Critter. Show all posts

Friday, April 6, 2012

Hoppy Easter Banner

Yesterday I enjoyed a nice relaxing day at home with my boys.  It has been such a wonderful week being able to spend time with them.  I cannot wait until summer vacation....only 3 months.  Yay!  So yesterday's crafting task revolved around a new Easter banner.  I made an Easter Peep banner last year (at the beginning of my banner making phase).  Now....we all know how when you start to evolve in your skills and creativity the items you made at the beginning of your adventure just aren't up to par.  Okay, let's face it....it's just not good....at all....  Hence.....the NEW Easter banner.  I am MUCH happier with this banner.  PLEASE bear with my photos....I've been taking the pics with my phone, and apparently I need to stop doing that.  It's just SO much easier than having to hook my camera up to the computer to download the pics.  Does anyone else feel this way?


To make this banner I used the following items:

Paper:  Reminisce (I actually had leftover paper from either last year or the year before)
Cricut Cartridges:
        Birthday Bash-Banners cut at 6"
        Create a Critter-Bunny cut at 4 1/2", Carrots cut at 1", Basket cut at 2 1/2"
        Alphalicious-Letters cut at 5"
        Doodlecharms- Eggs cut at 2" and 4 1/2"
Peachy Keen Stamps-Critter Faces (Large)
Stampin' UP Chocolate Chip stamp pad-I used this for the distressing
Twine-
Close up of the end piece.  I really like the basket of eggs and carrots.  :-)  I added stitching to the carrots, but distressed and speckled the eggs.  I like the looks of them...it really matched the look of the paper. 

I added a few buttons to this piece for something different.  The thread used was twine by My Mind's Eye.

The husband took today off to spend a day with the family.  We're getting ready to head out and go bowling.  Yahoo!  I feel a heavy competition brewing. Have a great Friday!


Sunday, February 19, 2012

A Few Cards

I am so glad it is Mid-Winter Break....it was nice to relax and make some cards today with a couple of my friends.  I was in need of birthday cards, so that was my goal today. 

This first cards is just a simple birthday card.


For this card I used the Simply Charmed cartridge for the Happy Birthday.  I used my Gypsy to delete the faces on the a and the d.  I cut out the image at 3".  I then used my Peachy Keen Everyday Character Face Assortment stamps to add the faces.  The paper I used at the top is from 3 Bugs in a Rug.  I then added the three brads to the bottom.

The next card I think I'll use for when the boys have birthday parties to go to.


To make this card, I used the Create-a-Critter cartridge.  I cut the terrier at 2 1/2".  I cut the hat and present from the same cartridge.  The hat was cut at 2 1/2" and the present was cut at 1 1/2".  I added a bone brad for the collar and then two paw brads for something different.  I think I bought these brads at Michaels.  I added stickles to the hat and the present for a little bling.  The Yappy Birthday stamp is from My Pink Stamper's Even More Punny-licious stamp set.


I think this next card just might be my favorite....the koala is just too cute. I figured I could either use it as a birthday card OR as an everyday "just because" card.


For this card I used the Create-a-Critter cartridge.  I cut the koala at 3".  The background paper I had left over from a banner I made a while ago.  The paper is from Pebbles.  It's their New Arrival line.  I decided to mat it just to change up the look my cards usually have.  The G'day Mate sentiment is from Scrappy Mom's "Amusing Animals" stamp set.

This last card I made over winter break for my grandma.  She LOVES penguins.  I think they're pretty cute, too.


For this card I used the Simply Charmed Cartridge.  I cut the penguins at 3".  The igloo was cut at 1 1/2".  I tore the white paper to give it the look of snow.  The have an "ice" day sentiment is from My Pink Stamper's Winter Punnies stamp set.


I hope everyone is enjoying the long President's Day weekend! 


Monday, February 13, 2012

Happy Valentine's Day!

Wow!  I can't believe it's Valentine's Day already!  I love having the opportunity to tell people that I care about them....a couple of those people are my two boys, Nathan and Josh.  I just LOVE them!  They are so full of life and make everyday an adventure.

This first card I made for Nathan. 


To make this card:

Squirrel from Create-a-Critter cartridge cut at 3 1/2".
Acorn from Create-a-Critter cartridge cut at 1 3/4".
Nuts About You stamp from My Pink Stamper---Punnylicious
Mini Heart Punch

This next card is for Josh.


I used Create-a-Critter to make this card, as well.

Dinosaur cut at 3 1/2"
Palm Tree cut at 3"
You're Dino-mite! stamp from My Craft Spot---Build a Valentine

I hope everyone has a wonderful Valentine's Day filled with love! <3


Thursday, December 22, 2011

Deck the Halls...

....with boughs of holly.....Fa-la-la-la-la-la-la-la!  We have been "officially" on vacation for 4 days now.....and I'm LOVING it (except for the 4 1/2 hour car repair escapade yesterday).  I'm starting to finally feel like my house and mind are ready for Christmas.  There are still so many things left to do before my parents come fly in on Saturday morning, but I feel confident that it can be done!

I thought I would share some of my Christmas decorating....some of it is made (with ideas stolen from other blogs or from ideas I found in magazines) and others are traditional store-bought festiveness (we can't do it all, now, can we??).  :-)

First up....the tree.  The tree has been an adventure this year.  Since we travel every other year, we decided a couple of years ago to go ahead and purchase a pre-lit tree.  Good idea, considering you have to find someone to make sure your tree is watered while you're gone.  It's also a good idea when 2 out of the 4 people in your house are allergic (and I mean REALLY allergic) to the pine trees.  Good thing we live in the Pacific Northwest, huh??  Well...when you buy these prelit tree, no one tells you that the lights can go out and it's virtually IMPOSSIBLE to find replacement bulbs.  Needless to say, our tree came out of the box this year with 1/4 of the lights out.  :-(    Other than the lights mishap, I LOVE our tree....each ornament has a meaning...I love taking out our ornaments each year...it brings back so many memories of how we got the ornaments (I especially LOVE looking at the ones the boys have made throughout their elementary school years). 


This next picture is of my new-ish piano.  Joshua has been taking piano lessons for a couple of years now and has been practicing on my old Casio keyboard that I got when I was in junior high.  So this summer, we buckled down and purchased a 1920s upright grande.  LOVE IT!  It's sound is phenomenal....not to mention the color is fabulous.  I've had so much fun getting back on the piano myself and playing again.  It's also fun to decorate....


The next picture is a close-up of a few items on top of the piano.  The Santa and his elves are creations by my dad.  He's an incredibly gifted artist / retired art teacher. 

Next up are the mini Santas my dad made for me.  In the background is a Pinterest-find.  I love the Christmas Bible passage on this picture.  You can find it on my Christmas board on Pinterest.


The next pictures are of my fireplace / mantle / banner.  I made the banner using my Cricut.  For the circles I used the Birthday Bash cartridge.  I cut the banner pieces at 4".  I used the Alphalicious cartridge for the letters...also cut at 4".  For the reindeer, I used the Create-a-Critter cartridge.  I cut the reindeer at 8".  I added red stickles to his nose and a red sparkle to his collar.  


The next picture is a project I found on Pinterest, as well.  I just loved it and knew I wanted to make one...I ended up making 5.  :-)  I found the 8x8 shadowboxes and vinyl saying at Ben Franklin craft store.  All I had to do was add the vinyl to the front of the glass, find some Christmas paper I liked, which for this one was some red music paper I had on hand, and add some jingle bells.  I love how it turned out!

This last picture is a Christmas tree made out of spools.  I actually saw this idea at Ben Franklin.  All I needed were some wooden spools, wooden stars, a little brown embroidery floss, strips of Christmas paper, and a little hot glue.


Well....I think that is all for today.  I'm hoping to get some more baking done tonight and post a few more things tomorrow.  Fingers crossed!  I hope everyone has a wonderful Christmas!


Wednesday, August 10, 2011

Projects, Projects, Projects

August seems to always be the fastest month of the year for me.  I feel like it sneaks up on me and then sprints to the end of the summer, all the while, packing in doctor appointments, soccer practices, tournaments, camp, and trying to set up my classroom for the school year.  Why is that??  This year has proven to be no different.....I have been really busy with all of the above, hence the reason I haven't blogged in a while.  However, here are a few of the projects I've been working on.  They are all school related, but there are a few other crafty projects to be posted soon!  
My theme in my classroom this year is polka dots on chocolate....I think I already blogged about that.  :-)  I am also incorporating a few owls here and there because they are just so darn cute....I can't help it! 
Last year, I had a basket with a label, of course, titled Book Hospital.  I needed a place for my students to put damaged books for me to fix (and my desk is not an option).  It seemed the most logical solution.  I did like the basket, but I wanted something cuter this year....plus I really want to use that basket for something else.  :-)  This first picture is of my new Book Hospital.


Supplies Needed:
*Beverage Bucket.....Target $1 (fantastic deal!)
 *Baby Steps cartridge
 *Pink vinyl
 *Lots of ribbon

This next picture is of the step stool I am using in my classroom.  My students often use it to reach the top of our SMARTboard.  I had a red plastic step stool last year that I found at Target in the dollar section.  I think it cost me $2.50.  It held up great!  However.....it did break because of my clumsiness.  Boo!  So...I found this wooden one....at Target.  I just cut out some circles on my Cricut to jazz it up a bit.  Isn't it cute??

Supplies Needed:
*Wooden Step Stool
*Plantin Schoolbook cartridge---circles cut at various sizes.  I did use Roly Poly to get the empty middle.
*Vinyl--brown, pink, green

These next pictures show my new whisper phones.  These tools are used by students so they can hear themselves reading.  It's super neat how these work!  These are tools I have always wanted in my classroom, but have never had the money to purchase.  They are terribly expensive.  I think I found 12 for $70.  OUCH!  So....I went to Home Depot in pursuit of creating my own.  I had a friend who made hers, so it was rather easy for me to grab the supplies I needed.
Supplies Needed:
*PVC 3/4" Elbows (these came in a package---it was cheaper)-$2/pkg
*PVC pipe (which this great guy at Home Depot cut for me for free)-$1.50
I think for this whole project, I spent $20 and was able to make 30 whisper phones!  Much more affordable!

All I did was take two elbows and connected them with the pvc pipe.  Super easy! Then you get the following picture:


And because I like to have EVERYTHING organized in my classroom....I cut vinyl numbers (to match each student's number).  I put each number in the middle of the phone.  For the numbers, I used the Alphalicious cartridge.  I chose the short stack feature and cut the numbers at 2".


 This next project was Pinterest inspired.  I think I seriously have an addiction to Pinterest.  Oy!  So....here's the project I pinned...okay....never mind....I can't figure out how to post a picture from someone else's blog.  Any tips, please help!  Here's the link instead...http://whattheteacherwants.blogspot.com/2010/11/student-birthdays.html
I just thought these pixie stick birthday treats were adorable.....so here's my spin on the idea.


 For my birthday pixie stick treats, I decided to use the smaller pixie sticks.  I also decided to make a cute little bucket for the pixie sticks to go in.  I love it!


Supplies Needed:
*Create a Critter Cartridge--balloon (I used my gypsy to delete the face)
Alphalicious Cartridge--letters cut at 2"
*Peachy Keen Stamps--Everyday Character Face Assortment
*Bucket (I found these at Target last spring.  This was left over from some Easter baskets I made. They were $1 each, so I kinda stocked up.)
*Vinyl
*LOTS of ribbon 


And....my last project for tonight.....I really wanted a banner to hang back by my small group table.  It needed something fun and cheery.  I decided to make this READ banner, with polka dots and owls!

Supplies Needed:
Birthday Bash Cartridge--pennants cut at 6"
Create a Critter Cartridge--Owl cut at 4"
Alphalicious Cartridge--Letters and shadows cut at 4"
Ribbon


Thanks for hanging in there with me tonight!  Lots of projects going on!  I can't wait to share what I've done with some furniture!  Have a great night!

Thursday, July 28, 2011

Classroom Craftiness

As promised...I am going to post some of the things I've made for my classroom and a few other classroom related pics.  I would love any feedback you can give me, additional ideas, etc.  When I'm back at school getting everything set up, I will post completed pics.  I can't help myself....I have to decorate my classroom in a theme.....and I like it to coordinate....part of my teacher OCD, I suppose.  :-)  This year's theme will be polka dots, more specifically, dots on chocolate (I'm using a lot of the Creative Teaching Press Products), and throwing in a few owls here and there.  I figured the owls would fit in......plus they're so darn cute!  :-)

This first picture is of the labels I will put on the student cubbies.  I made one for each cubby 1-30.  Each student is assigned a number.  When they put their names on things, they also write their number....it just helps me with organization and helps so I don't have to remake labels every year for files and such.


For these tags, I used the following:
-Creative Teaching Press Frame Cut-outs
-Cuttin' Up Cartridge-cartoon cut at 4"

This next picture is of the letters I'll use for my word wall.  I did all of the consonants in blue and the vowels in pink.


For these dots I used the following:
--Plantin Schoolbook Cartridge for the circles---shadow cut at 4", regular circle cut at 3"
-Cuttin' Up Cartridge for the letters--cut at 2"

This next picture is a poster I made.  I found this cute acrostic saying on a proteacher.net message board when I was searching for bulletin board titles with a polka dot theme.  I instantly fell in love with this!  I'm hoping to train my kiddos to say the poem after I prompt with "DOTS."  Cute, huh?!?!?


For this poster I used:
-Creative Teaching Press Dots on Chocolate posterboard
-Plantin Schoolbook Cartridge for the circles--cut at 4"
-Cuttin' Up Cartridge for the letters--large letters in the circles were cut at 3 3/4" and the rest of the letters were cut at 2 1/4"
          -I then used my Creative Memories punch to punch out different colored circles to add to the large letters.....these were cut at 3/4"

This next picture is of a poster with pockets labeled with numbers.  One way I keep my classroom library organized is by having these pockets.  Each student has a pocket (again, their number).  In each pocket will be 3ish sticks with a dot on top (also labeled with their number).  Each of my library baskets is labeled and has a pocket on the front of the basket.  I don't have a pic of that yet, but I will soon.  So...the student takes their dot stick and when they find a book they want to read, they put their stick in the pocket of the basket they took the book from.....that way when they go to return the book, they remember where they got it from.  Does that make sense???


For this poster:
-posterboard
-Dots on Chocolate library pockets

I like to use daily take home folders in my classroom.  I have found over the past 11 years of teaching (wow!  I can't believe it's been that long) that regular 2 pocket paper folders NEVER hold up.  So, I splurge and purchase the plastic 2-pocket folders for my students.  I tried this for the first time last year and they held up the ENTIRE YEAR!  LOVED IT!  There are a lot of cute acronyms for folders....I have found a variety of names for folders through proteacher.net. I think the original idea was a M.O.O.S.E. binder.   I don't have the money to create binders for my students, so I just stick to folders.  Plus....it works for me.  A lot of websites you can print folder / binder covers, but I knew the paper would never stick with glue to plastic.  So....I made my own and printed them on 2x4" labels.  The inside will have labels on each pocket....on the left.....Left at Home.....on the right....Bring Right Back to School.


This next picture is just a super cute lamp that had a kind of dot-ish type feel to it....and I love the color.  I'm thinking it will fit right in!  Classroom library maybe???  I got it at Target.  I think they're on sale this week for $12.


So I HAD to make a few owls.....they are so cute....I think I'm going to hang one in my classroom library.  I might have to make a few more and hang them about the room.  :-)

For these cute little critters, I used:
-Create a Critter---cut at 11 1/2"

And now for classroom pics.  I was able to get into my room on Monday, even though the carpet hasn't been cleaned and the tile still needs to be done.  But....I got in and decided to take a few shots to share.  Our classrooms are L-shaped, so bear with me as I explain.

View as you look in through the door.  Sink / cabinets directly to your right.  SMARTboard just beyond that.

This is the back part of the L-shape.  Classroom library will be in back left-hand corner.  My small group table will go right near the white board (I think).

View of the cubbies and a learning wall.
View of the front of the room from the back.


Well...I think that's all for today.....thanks for hanging in there with my super long post today.  :-)  Feel free to leave any comments / suggestions / ideas you might have.

Thursday, July 21, 2011

Greetings from Seattle

Greetings from Seattle!  The weather all over the nation has been kind of whacky lately.  My thoughts are with my family and friends dealing with the heat and humidity in the midwest.  I can't imagine having to deal with that.  I'll take my Pacific Northwest weather!  :-)  That being said....the Pacific Northwest hasn't been ideal for summer weather either.  Usually our summers are fabulous!  We have sunny days and comfortable temperatures with no humidity.  Well....this year has been the exception.  While my family and friends are frying in the midwest, we have had unusually cool (like I'm under a blanket cool) and rainy days.  :-(  BOO!  So...I found this really cute image in my Create a Critter cartridge that I wanted to use to make a Seattle themed card.  Here it is....


Recipe for this card:
A2 sized card
Patterned Paper & light blue cardstock cut at 2 1/2 inches
Duck on p.31 of Create a Critter cut at 3 inches
Umbrella on p. 31 of Create a Critter cut at 3 inches
Peachy Keen Critter Faces for the Duck
Peachy Keen Everyday Character Faces for the Umbrella
Greetings from Seattle Stamp from AMuse Art Stamps

**I used my gypsy to remove the faces for both the duck and the umbrella so I could use my Peachy Keen Stamps.

Well...I hope everyone is having a wonderful day!


Tuesday, July 19, 2011

Very Hungry Caterpillar

It has been a very busy couple of days at my house.  This week at our church is VBS.  My oldest son and I are volunteering and my youngest son is a participant.  I am having so much fun helping to lead the music at VBS, but quickly found out yesterday how tired I can get.  Whew!  Both Nathan and I came home and slept for a couple of hours.  Despite all the busyness, I did get my nephew's birthday banner done!  Yay!  My newphew is turning 1 next moth (I can't believe it!).   My brother and sister-in-law have decided that they want to have a Very Hungry Caterpillar theme for the party.  So....I created a birthday banner for him.  I am so excited...it turned out so cute!

This first banner is of his name and is meant to be on his high chair, across the front of the tray.

Recipe for this banner:
Birthday Bash Cartridge for the banner pieces
Create a Critter Cartridge for the caterpillar....on the cartridge I used the worm image.  I cut out all of the pieces, and then added another layer on top to make the head red.
Mickey Mouse Font Cartridge for the letters


This next banner is the Happy Birthday banner for the wall.  I cut the banner pieces larger for this banner since it would be hung on a wall.


Recipe for this banner:
Birthday Bash Cartridge for the banner pieces
Create a Critter Cartridge for the caterpillar
Mickey Font Cartridge for the letters


I hope everyone is having a wonderful day!  Leave me a comment and let me know what you think of the birthday banner!

Wednesday, July 13, 2011

Monster Birthday Card and Teacher Card

The past couple of days have been quite busy.  Yesterday I decided it was time to organize some photos and get them sent off to Costco to be printed.  I think it's almost been a year since I've completed a scrapbook layout.  Ouch!  I have to put that on my list of things to do this summer.  Today, I went to Costco to pick up the pictures, which turned out wonderful!  I got home and decided to steam clean my carpet (don't ask me why).  As I was cleaning, I got this sudden urge / nudge to steam clean the stairs (again, don't ask me why).  Cleaning stairs is such a tedious task.  I really HATE steam cleaning stairs.

Okay....on a happier, craftier note...here are a couple of cards I made this week.

This first one is a card I made for my nephew's birthday.  I can't believe he's going to be 6.  Wow!  So....I've had my Mini Monsters cartridge for a while and haven't really done anything with it yet.  I also have a cute monster stamp set I found at Michael's.  I decided to put the two together for this card.  The paper I used is from Reminisce. 


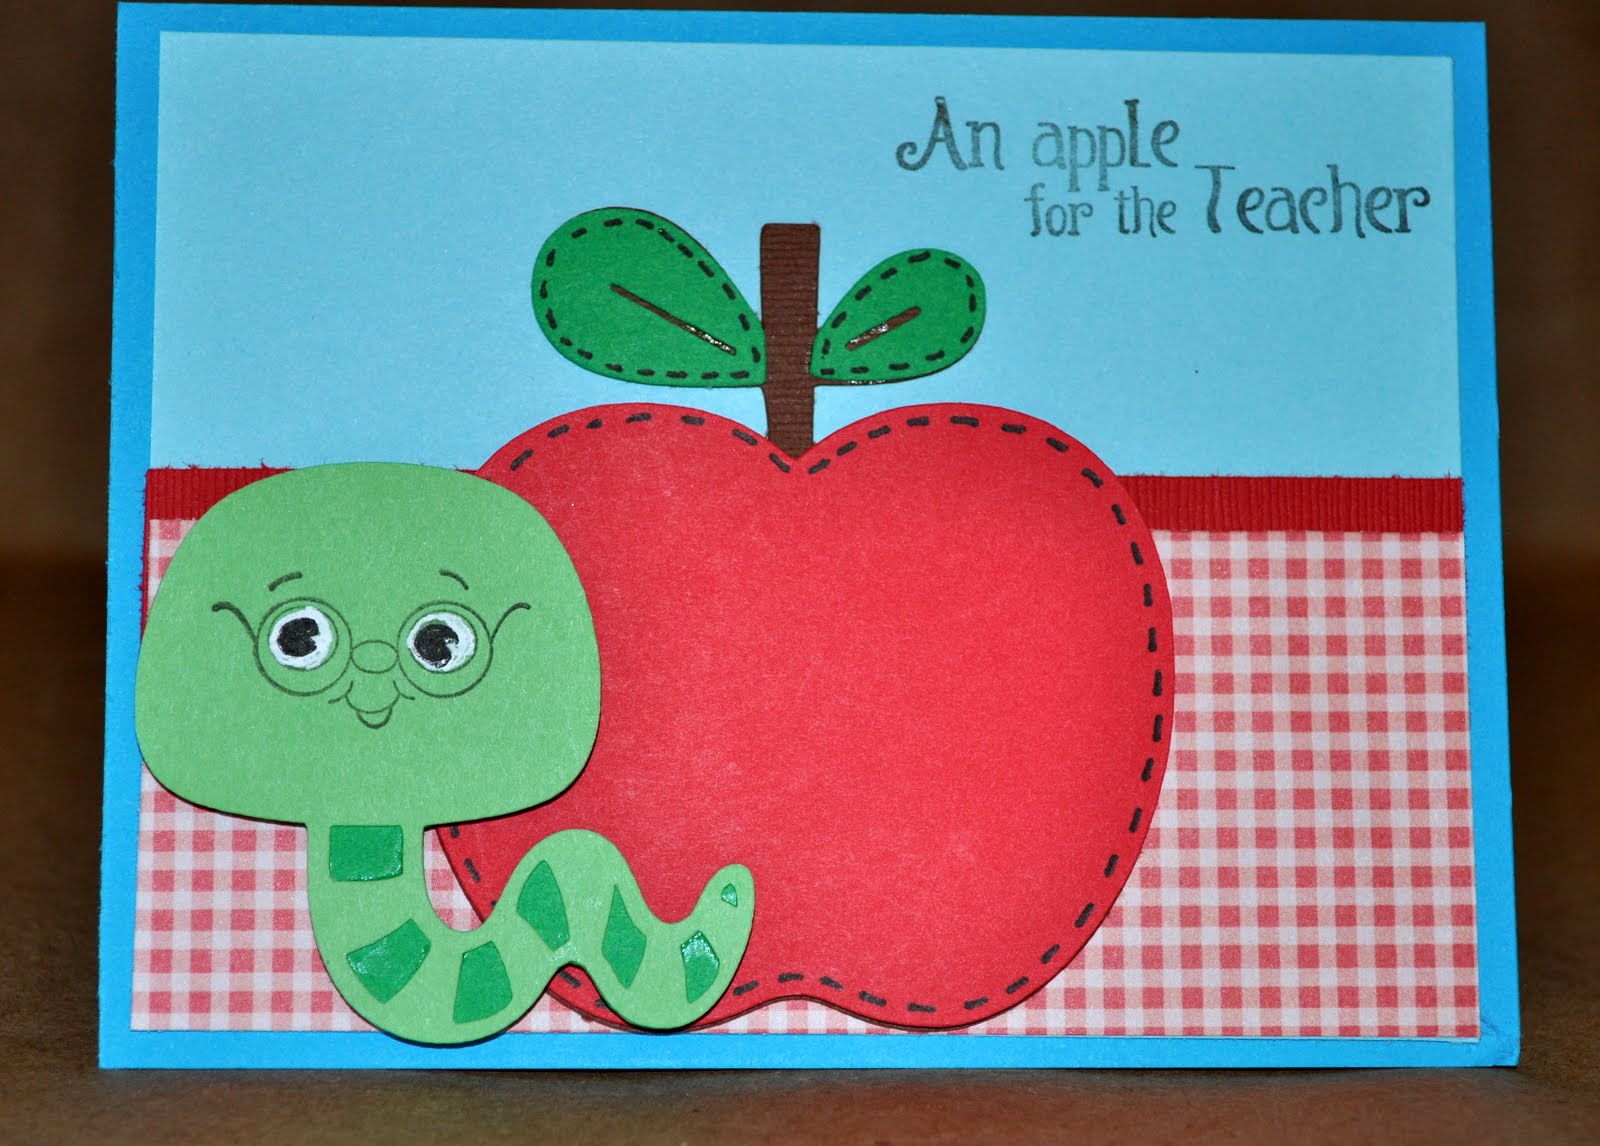
This next card I made just because I was feeling all teachery (is that a word?).  I like to have cards ready for my boys' teachers or teachers at my school that I like to surprise every now and then.  For this card I used the Create a Critter cartridge.  I used my Gypsy to delete the face of the worm so I could use my Peachy Keen Critter Faces stamp sets instead.  I also deleted the face of the apple, but decided not to put a face on it this time. The sentiment came from the Our Teachers stamp set from Pink By Design.


That's all for now......leave me a comment and let me know what you think!

Thursday, July 7, 2011

Cards

Here are some of the cards I've made over the past year or so.  Many of them were created using my Cricut.  Some were inspired by magazines or other crafters.
Cartridge Used:  Everyday Paper Dolls


Cartridge Used: Just Because Cards


Cartridge Used: Life is a Beach

Cartridge Used: Winter Wonderland


Cartridge Used: Preserves

Cartridge Used: Everyday Paper Dolls


Cartridge Used: Create a Critter

Cartridge Used:  Create a Critter

Cartridge Used:  New Arrival